Uptime Kuma in Azure Web App for Containers
Uptime Kuma is a self-hosted monitoring system that allows you to monitor the availability of various services. It offers a variety of monitoring types, including those for different types of HTTP endpoints such as websites or REST APIs.
As it is also available as a ready-made Docker image, you can easily deploy it as an Azure App Service. For rolling it out using Terraform, a simple configuration is sufficient.
The Terraform code for this post can be found on Github: https://github.com/davull/uptime-kuma-azure-app-service
Azure App Service
To run a Docker container in Azure as a Web App for Container, we need an App Service that resides in an App Service Plan. Alternatively, containers can also be run in Azure Container App or Azure Kubernetes Service, an overview is provided by Microsoft here.
To ensure that the data collected by Uptime Kuma (an SQLite database) is not lost with each container restart, we persist it in a Storage Account.
Resource Group
To organize resources in Azure, we create a new Resource Group. To do this, we search for Resource Group in the Azure Marketplace and click Create.
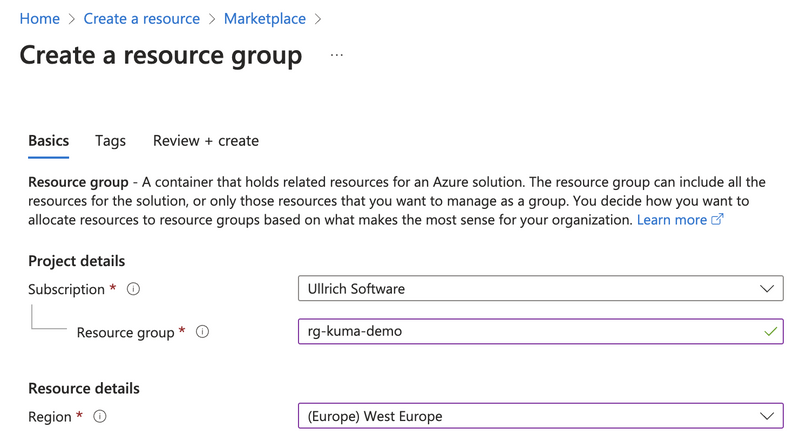
We assign a name, choose a region, and click Review + Create. Afterward, we can create our services within the Resource Group.
Storage Account
When creating the Storage Account, we select the created Resource Group, set the name, region, and redundancy level. For non-critical applications, the most cost-effective option is typically Local-redundant storage (LRS). The remaining settings can be kept as default.
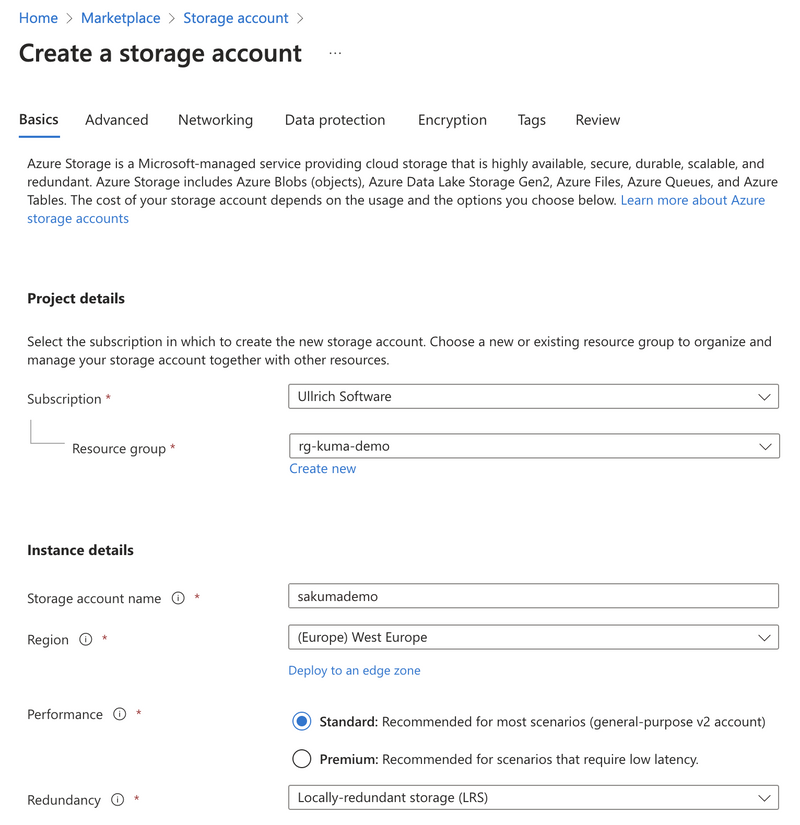
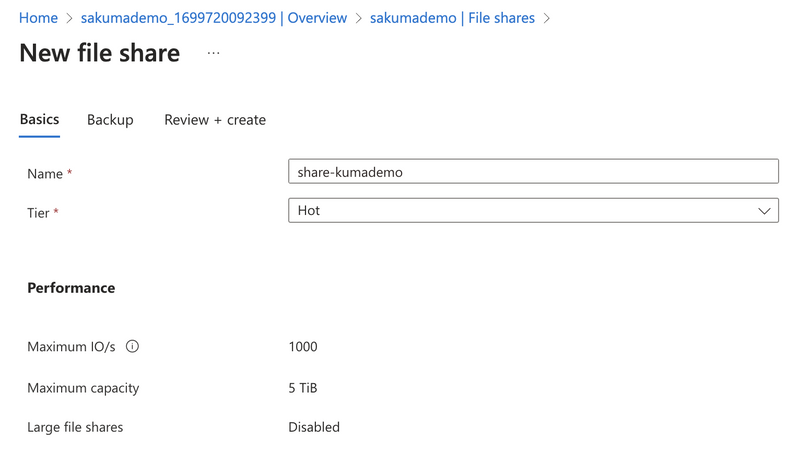
Once our Storage Account is provisioned, we can create a File share. For the tier, we choose Hot, and the backup option can be enabled or disabled based on our needs.
App Service Plan und Web App for Container
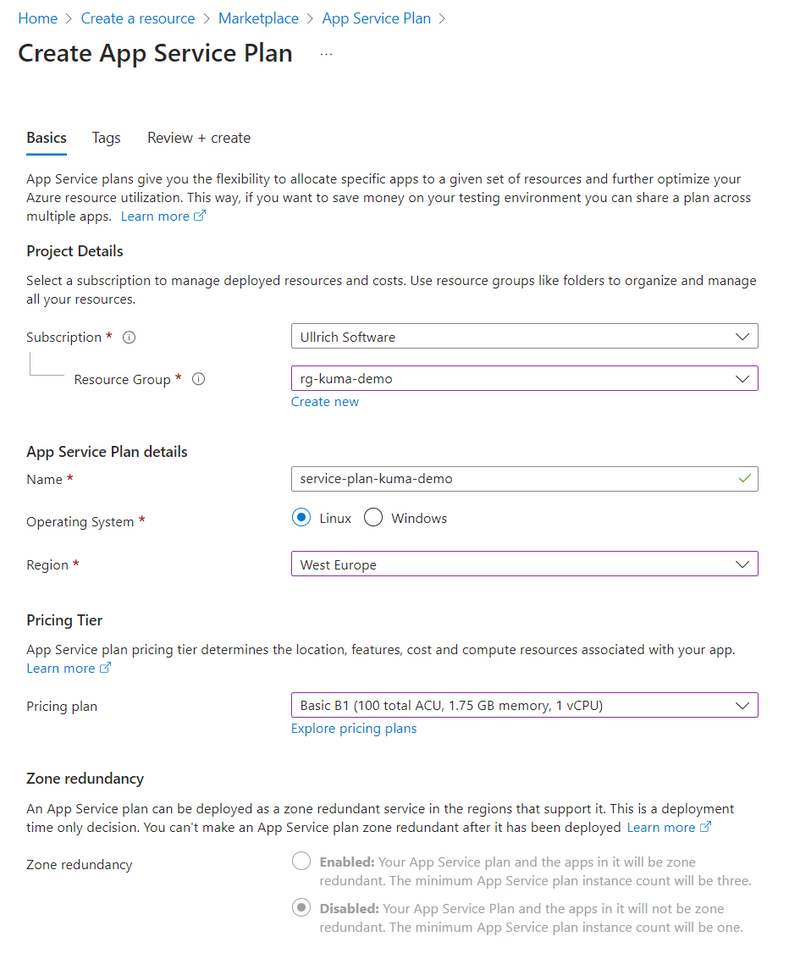
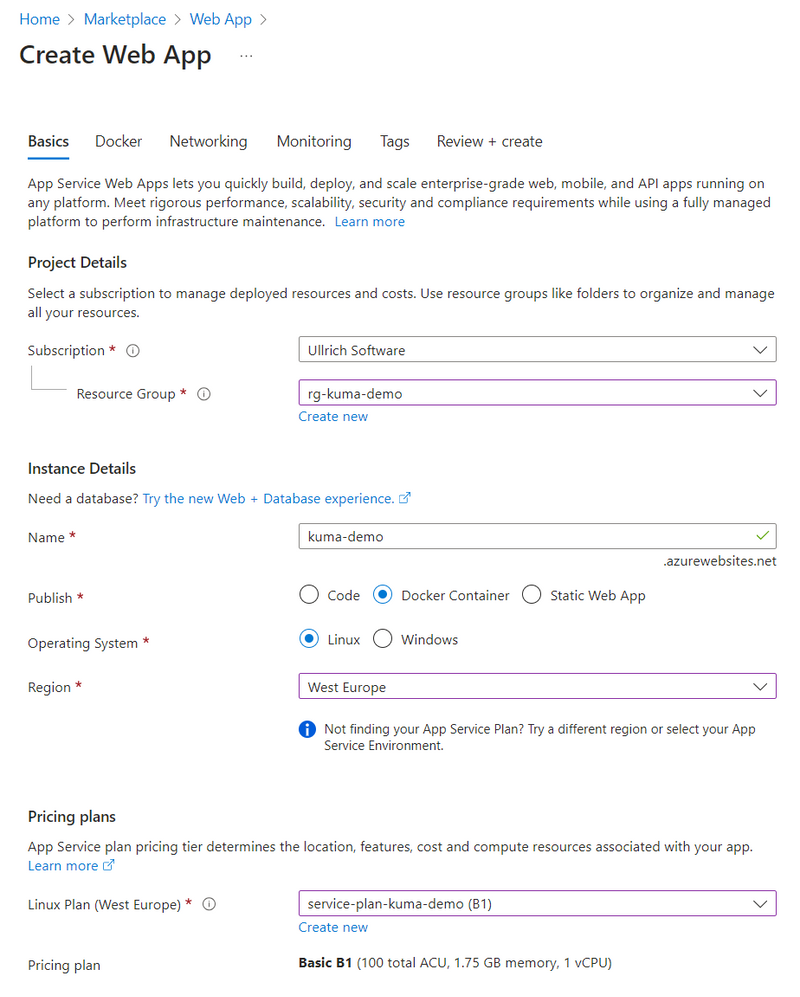
To create an App Service Plan, we follow a similar process. As the Operation System, we choose Linux, and the smallest non-free pricing plan Basic B1 is sufficient. This plan costs approximately €13 per month and provides 1.75 GB of memory and 1 vCPU. Depending on the number of services to be monitored, it might be advisable to choose a larger plan. However, scaling up can also be done at any time later.
Now that an App Service Plan and Storage are available, we can create the actual App Service. To start the wizard, we search for Web App for Containers or Web App in the Azure Portal. Although they are listed separately in the Marketplace, they represent the same service.
As the Publish method, we choose Docker, and for the Operating System, we select Linux. The name chosen here will also be the subdomain under which the service will be accessible later (<name>.azurewebsites.net).
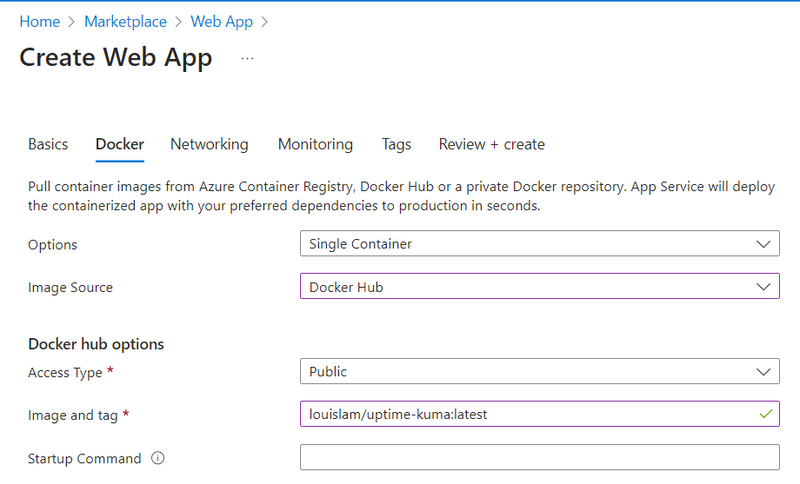
In the next tab, Docker, we switch the Image Source to Docker Hub and enter the desired image with the tag, for example, louislam/uptime-kuma:latest.
After completing the wizard, Azure pulls the Docker image from the Hub and starts our container. During the first launch of Uptime Kuma, it takes some time for the service to be up and running and the website to be accessible. You can track the process under the Deployment Center entry in the Logs tab.
Mount Azure File Share
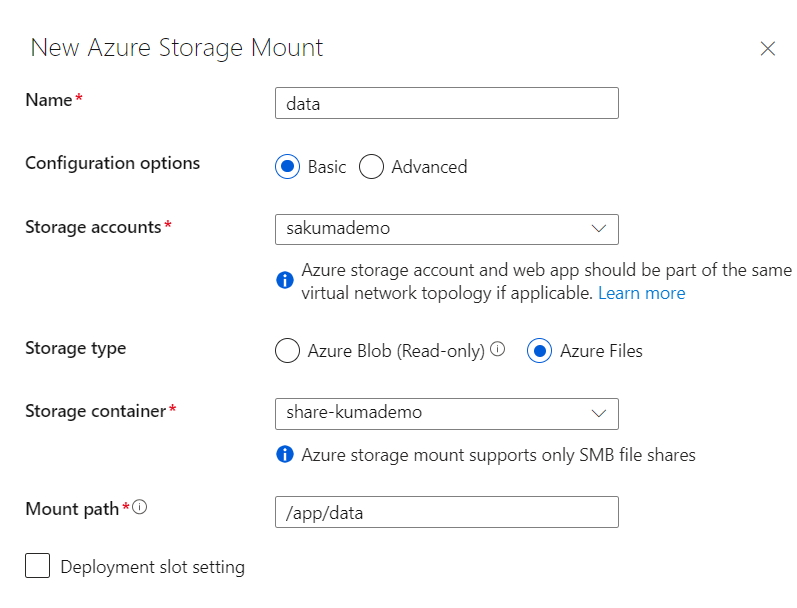
To ensure that the Uptime Kuma database is not lost with each container restart, we mount the previously created File Share into the container. To do this, select the Configuration section and go to the Path mappings tab. Add a new entry, choosing the previously created Storage Account and the Storage Container created for the File Share. Select Azure File as the Storage Type. The path under which the File Share is mounted in the container should be /app/data. This is where Uptime Kuma stores its application data. After saving, the container will be restarted, and the data will now be stored in our Storage Container.
When we now access the website of the Web App, Uptime Kuma greets us with the setup dialog, where we can create the admin user.
Terraform
As an alternative to the Azure Portal, managing the configuration of our application in a true Infrastructure as Code manner using Terraform is a great option. For this, we can utilize the azurerm Provider. The various authentication methods are described in the documentation. We create the same resources as we did in the portal using Terraform.
The configuration file looks like this:
terraform {
  required_providers {
    azurerm = {
      source  = "hashicorp/azurerm"
      version = "~> 3.79"
    }
  }
}

provider "azurerm" {
  features {}
}

resource "azurerm_resource_group" "rg_kuma" {
  name     = var.resource_group_name
  location = var.location
}

resource "azurerm_storage_account" "sa_kuma" {
  name                     = var.storage_account_name
  resource_group_name      = azurerm_resource_group.rg_kuma.name
  location                 = azurerm_resource_group.rg_kuma.location
  account_tier             = "Standard"
  account_replication_type = "LRS"
  min_tls_version          = "TLS1_2"
}

resource "azurerm_storage_share" "share_kuma" {
  name                 = "kumashare"
  storage_account_name = azurerm_storage_account.sa_kuma.name
  quota                = var.storage_quota
  access_tier          = "Hot"
}

resource "azurerm_service_plan" "service_plan_kuma" {
  name                = "service-plan-kuma"
  resource_group_name = azurerm_resource_group.rg_kuma.name
  location            = azurerm_resource_group.rg_kuma.location
  os_type             = "Linux"
  sku_name            = var.service_plan_sku
}

resource "azurerm_linux_web_app" "web_app_kuma" {
  name                = var.web_app_name
  resource_group_name = azurerm_resource_group.rg_kuma.name
  location            = azurerm_resource_group.rg_kuma.location
  service_plan_id     = azurerm_service_plan.service_plan_kuma.id
  https_only          = true

  site_config {
    http2_enabled       = true
    minimum_tls_version = "1.2"

    application_stack {
      docker_image_name   = var.docker_image
      docker_registry_url = "https://index.docker.io"
    }
  }

  app_settings = {
    "DOCKER_ENABLE_CI" = "true"
  }

  storage_account {
    access_key   = azurerm_storage_account.sa_kuma.primary_access_key
    account_name = azurerm_storage_account.sa_kuma.name
    name         = "webappstorage"
    type         = "AzureFiles"
    share_name   = azurerm_storage_share.share_kuma.name
    mount_path   = "/app/data"
  }
}
The variables are defined in a separate file.
variable "resource_group_name" {
  type = string
}

variable "storage_account_name" {
  type = string
}

variable "web_app_name" {
  type = string
}

variable "location" {
  type    = string
  default = "westeurope"
}

variable "storage_quota" {
  type    = number
  default = 50
}

variable "service_plan_sku" {
  type    = string
  default = "B1"
}

variable "docker_image" {
  type    = string
  default = "louislam/uptime-kuma:latest"
}
In a .tfvar file, the values for the variables are set.
resource_group_name  = "rg-kuma"
storage_account_name = "<your-storage-account-name>"
web_app_name         = "<your-web-app-name>"
Now, with a single command, we can create the entire environment and also delete it when needed.
terraform apply -var-file="terraform.tfvar"
terraform destroy -var-file="terraform.tfvar"